Publishing Vector Time Series
Publish Temporal Shapefile through GeoNode
-
From the folder
/opt/data/sample_data/gisdata/data/good/timeupload the fileboxes_with_date
-
The upload starts, but it will stop at
50%asking to the user for further inputs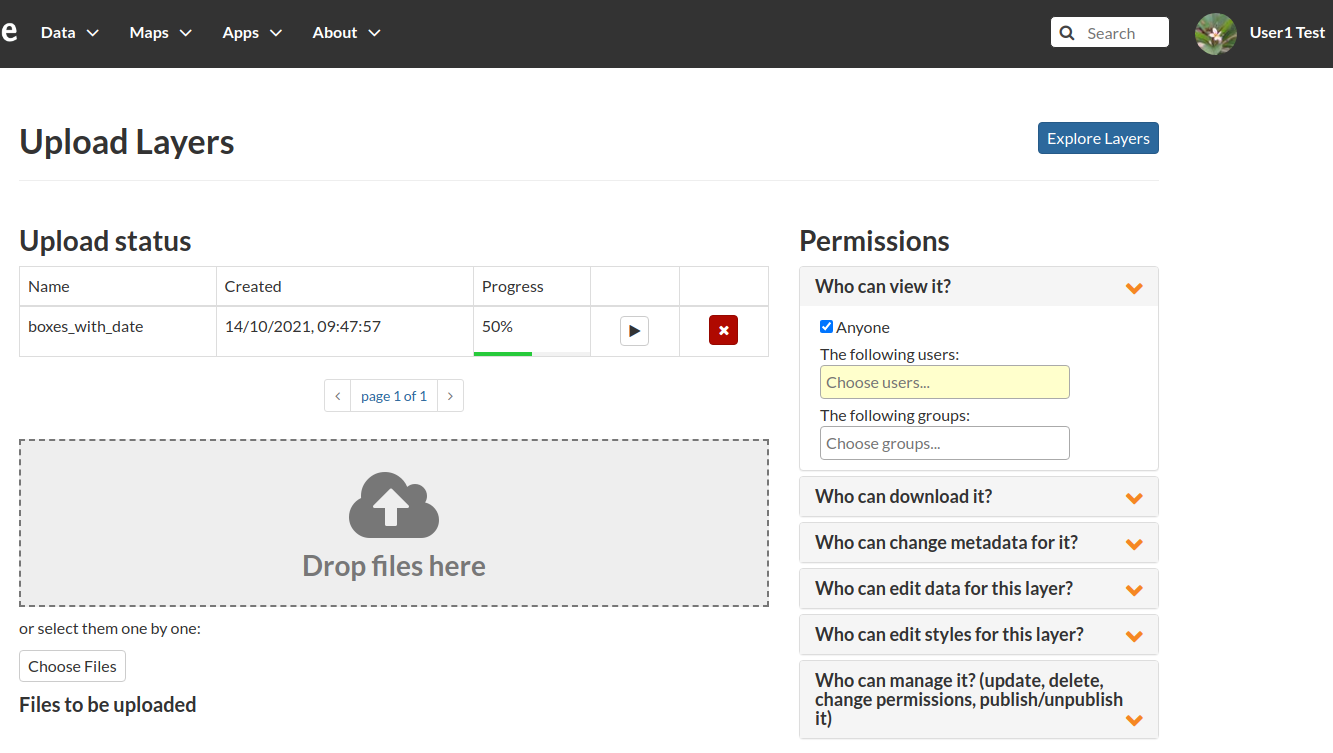
-
Click on the
playbutton, you will be redirected to a summary page with the list of the available temporal dimensions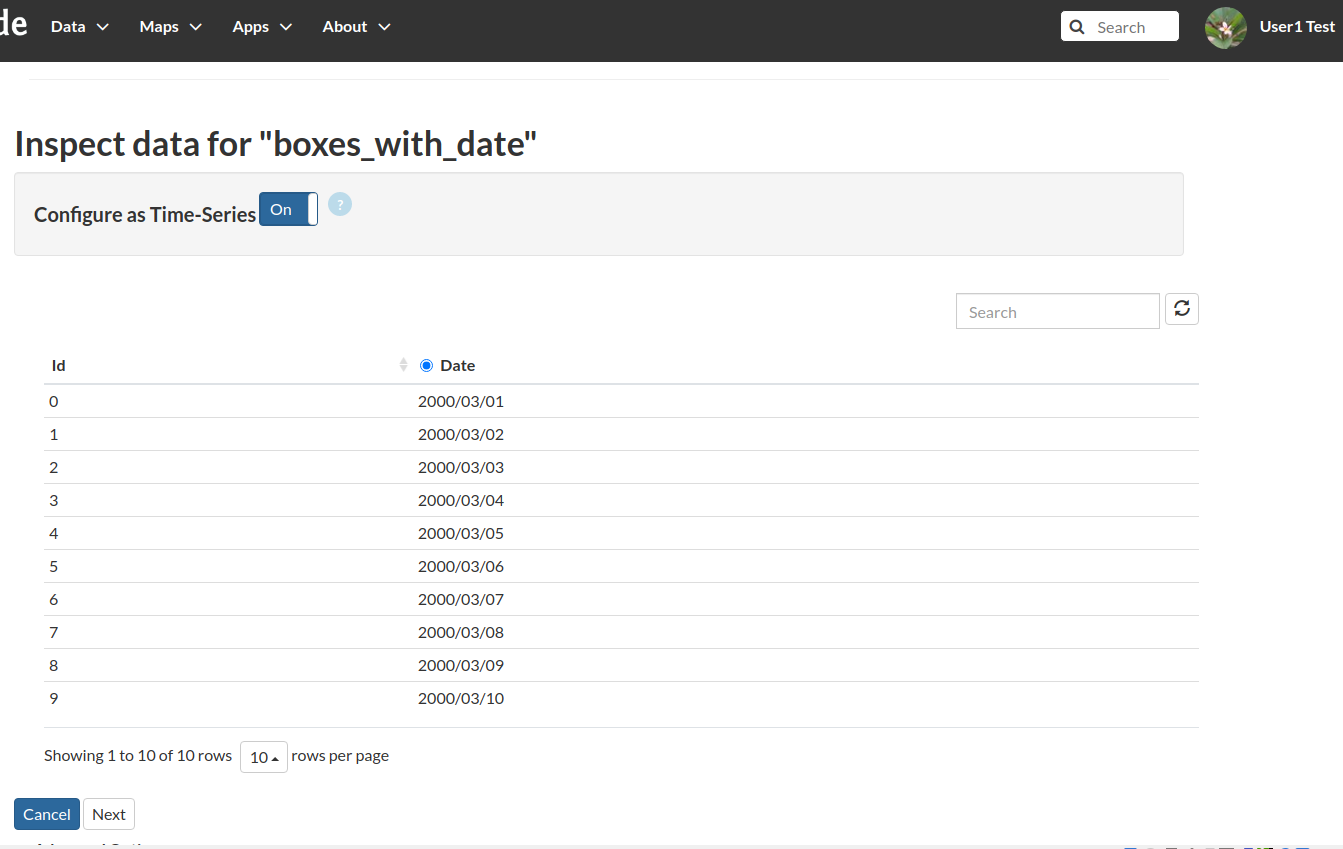
-
Enable the time check, select the
date fieldand click onnext; it will take some time to finalize the upload. When finished you will be redirected to the details page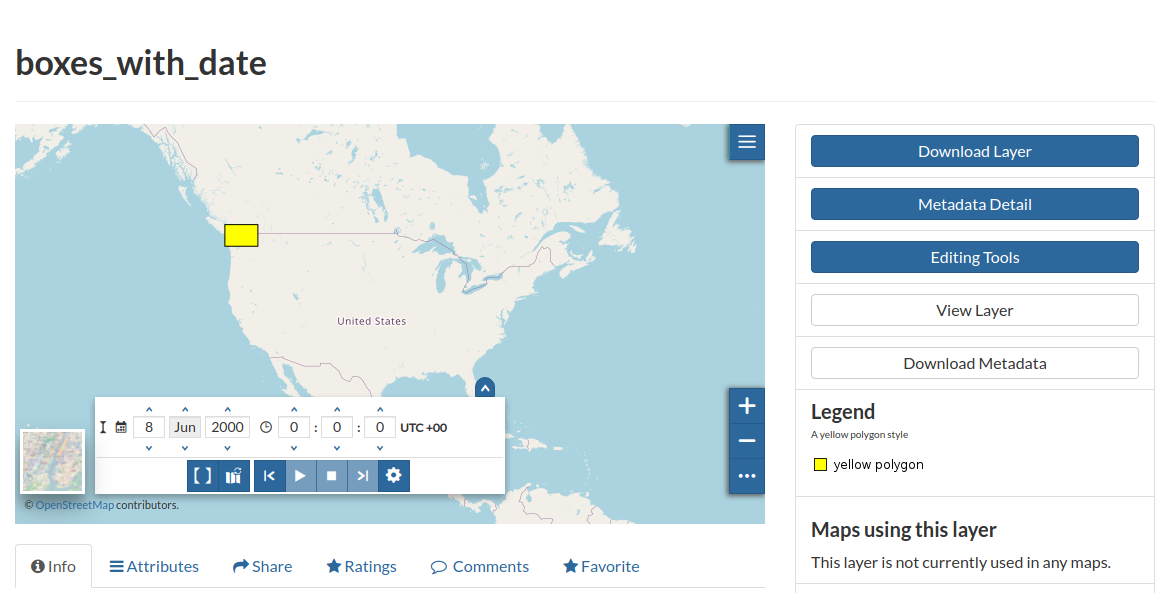
-
Click on
Editing Tools > Metadata > Wizardand switch to theSettingstab; you’ll notice that theHas Timecheckbox has been enabled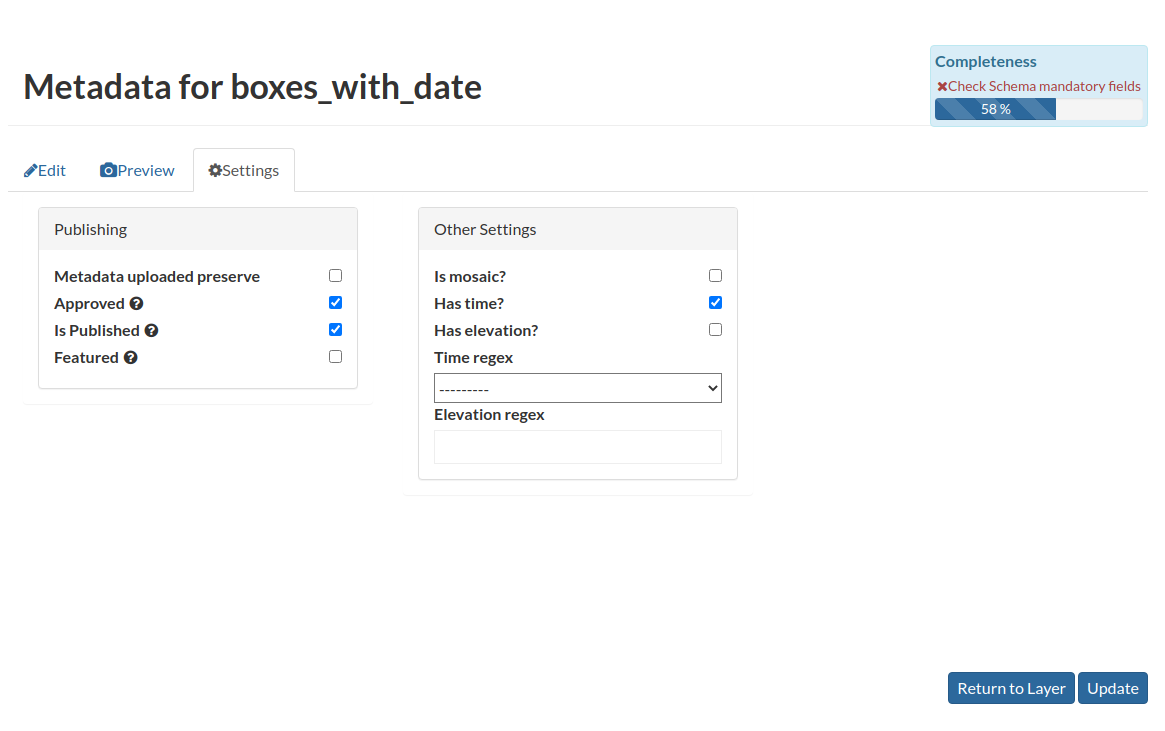
When che Has Time checkbox it enabled, GeoNode asks to the OWS Service for the time dimension values
-
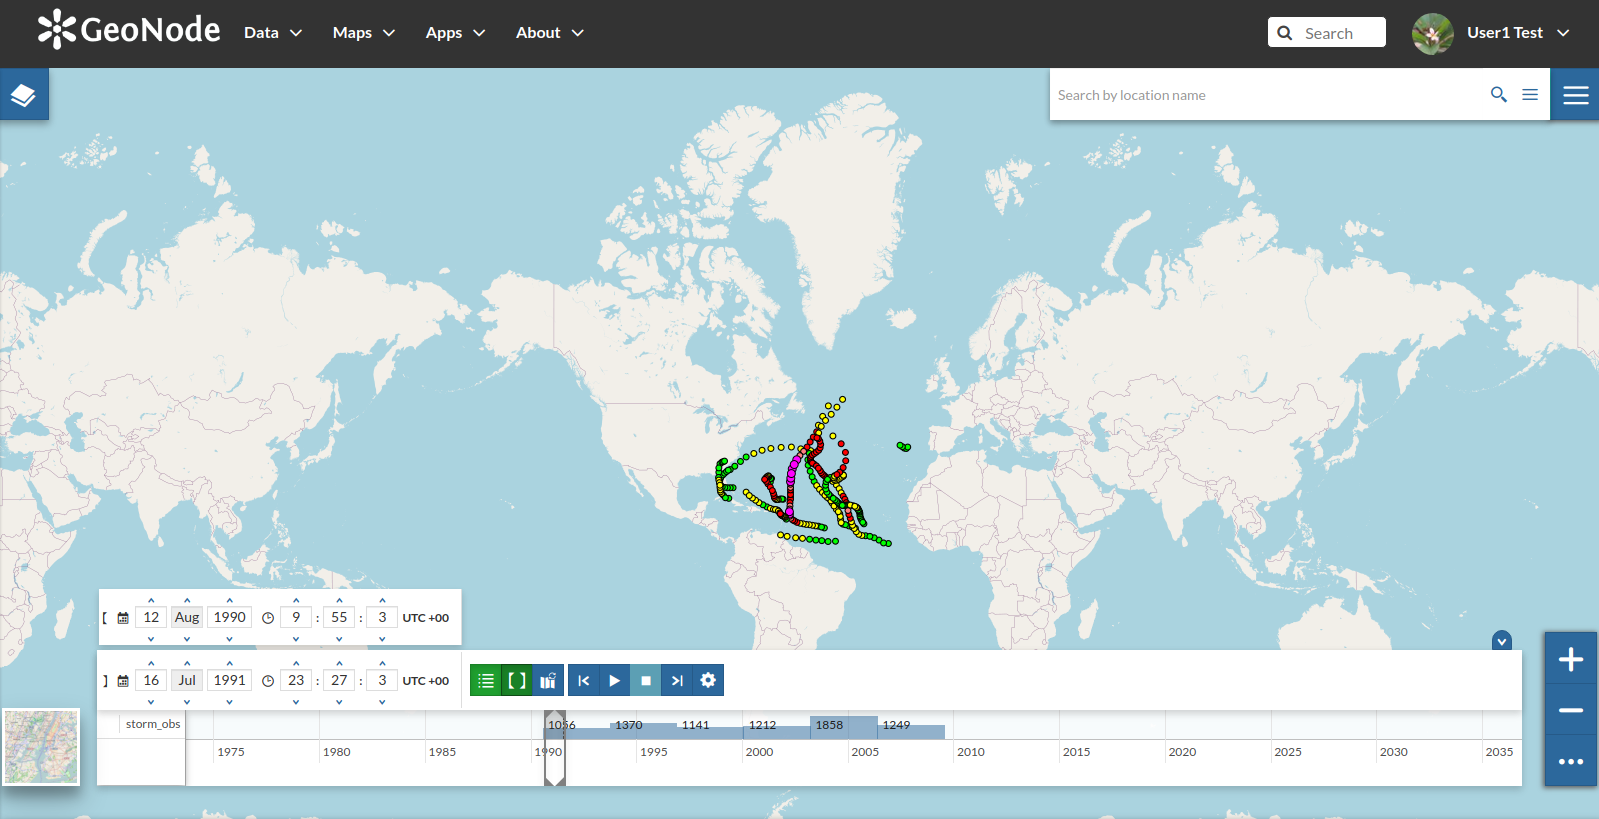
Notice the
time slidernow has been enabled on the map.
Publish Temporal Dataset through GeoServer
- Let’s prepare the datset first; we will restore some DB tables and create the layer on GeoServer
-
Open a terminal window and execute the following commands
  cd /opt/data/sample_data/user_data/storm_track_sql
  createdb -U postgres -O geonode storm_track_sql
  psql -U postgres storm_track_sql -c "CREATE EXTENSION postgis;"
  psql -U postgres storm_track_sql < storm_track_sql.db
  psql -U postgres storm_track_sql -c "GRANT SELECT ON TABLE storm_obs TO geonode;"
That will create a new DB and restore a table of the historical storms from an existing dump.
-
We need to create the layer on GeoServer first; as an
adminmove to the GeoServer admin gui, click onData > Storesand thenPostgis Data Store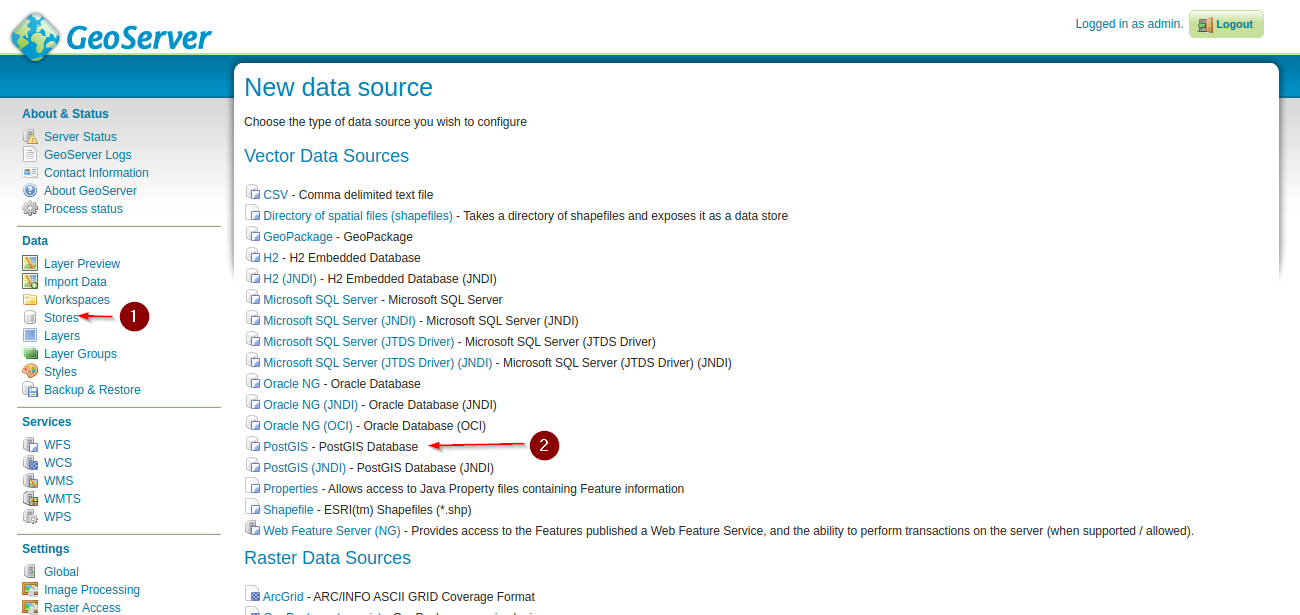
-
Provide the connection parameters to the new DB
- Name:
storm_track - Description:
storm_track - Database:
storm_track_sql - Username:
geonode - Password:
geonode

- Name:
-
Click on
Publishon the next window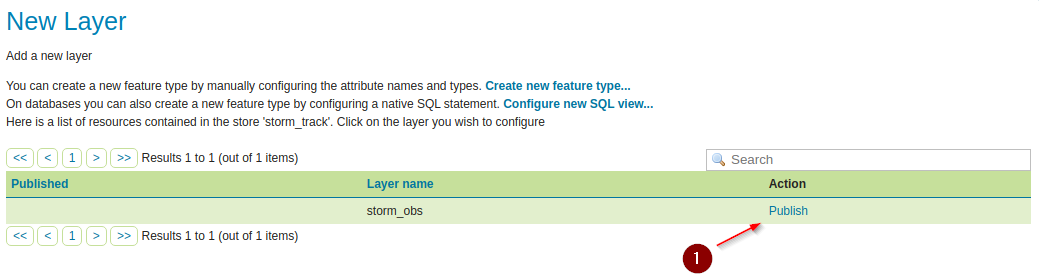
-
Compute the
Data Bounds
-
Click on the
Dimensionstab and enable theTime Dimensionas shown here below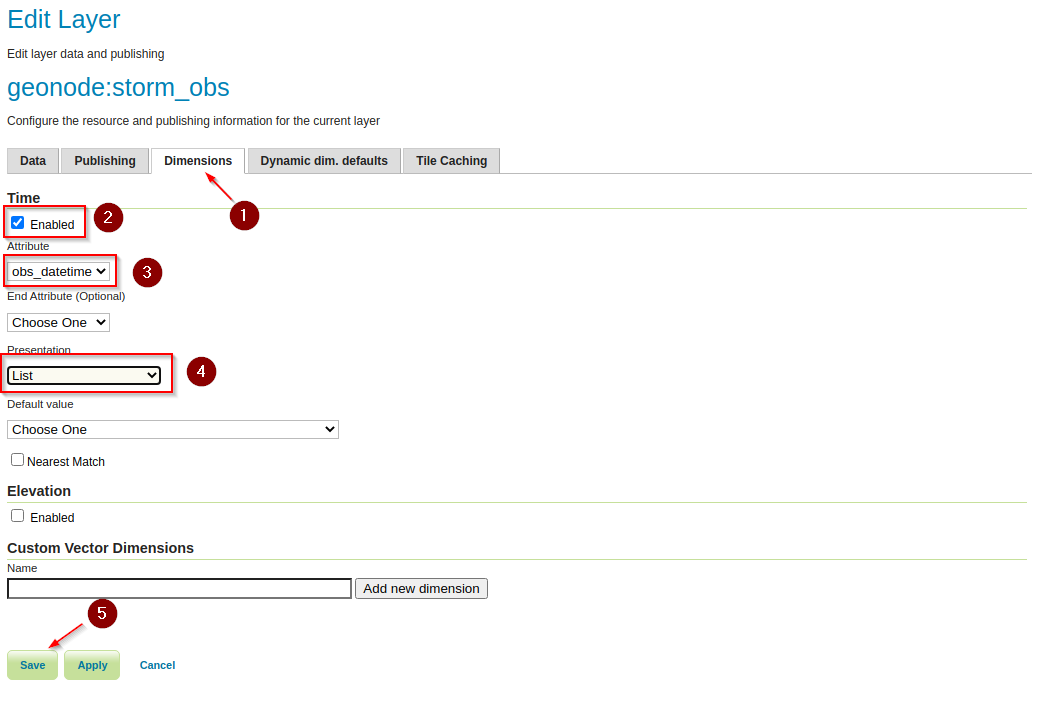
- The layer is ready and published on GeoServer, we need to import it on GeoNode now
-
Move to the terminal window, enable the
geonodevirtual environment and move to the folder/opt/geonode; execute theupdatelayersmanagement command as followsworkon geonode cd /opt/geonode ./manage_local.sh updatelayers --skip-geonode-registered -u test_user1 -w geonode -f storm_obs -
The new layer will be created on GeoNode, it will show only a single point without the
timeslider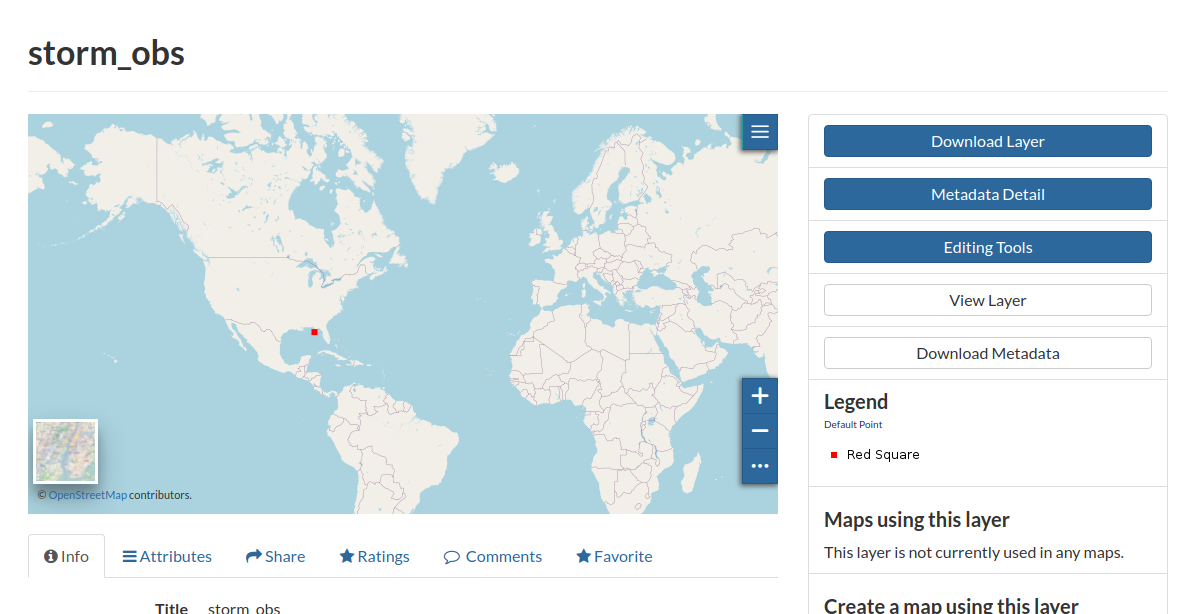
-
Edit the metadata and enable the
Has Timecheckbox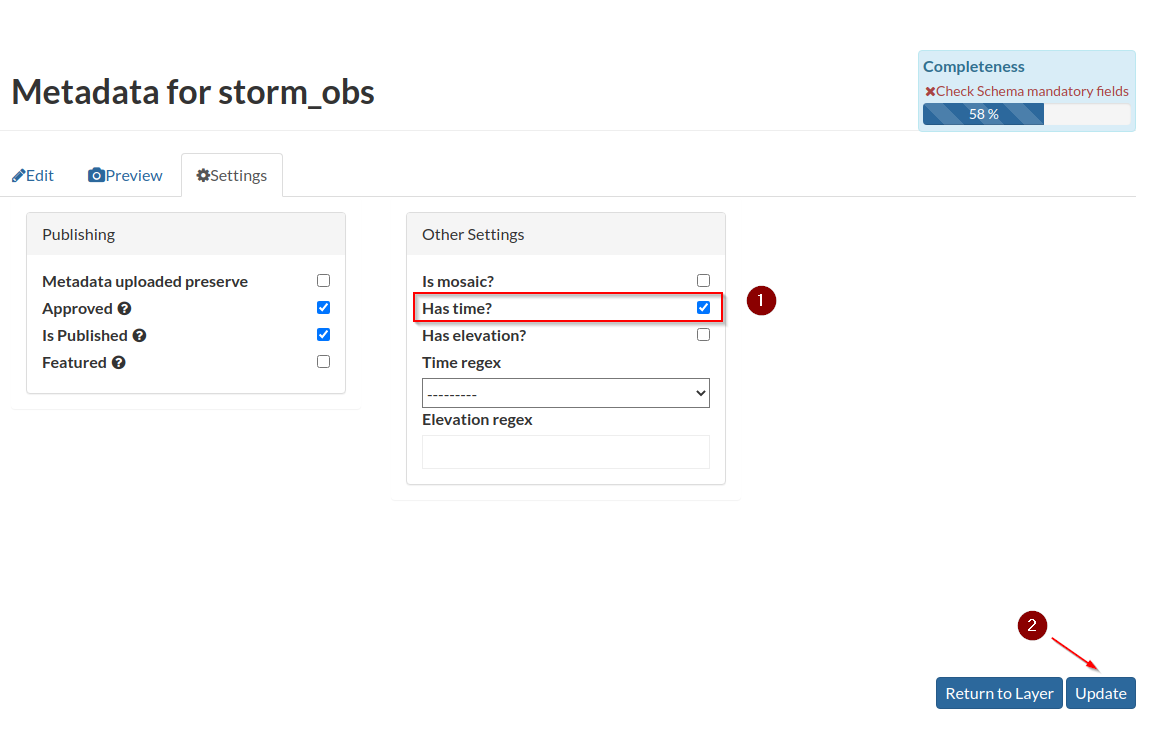
-
Save it and go back to the details page
-
Upload the
storm_obs.sldstyle file from the folder/opt/data/sample_data/pretty_maps/styles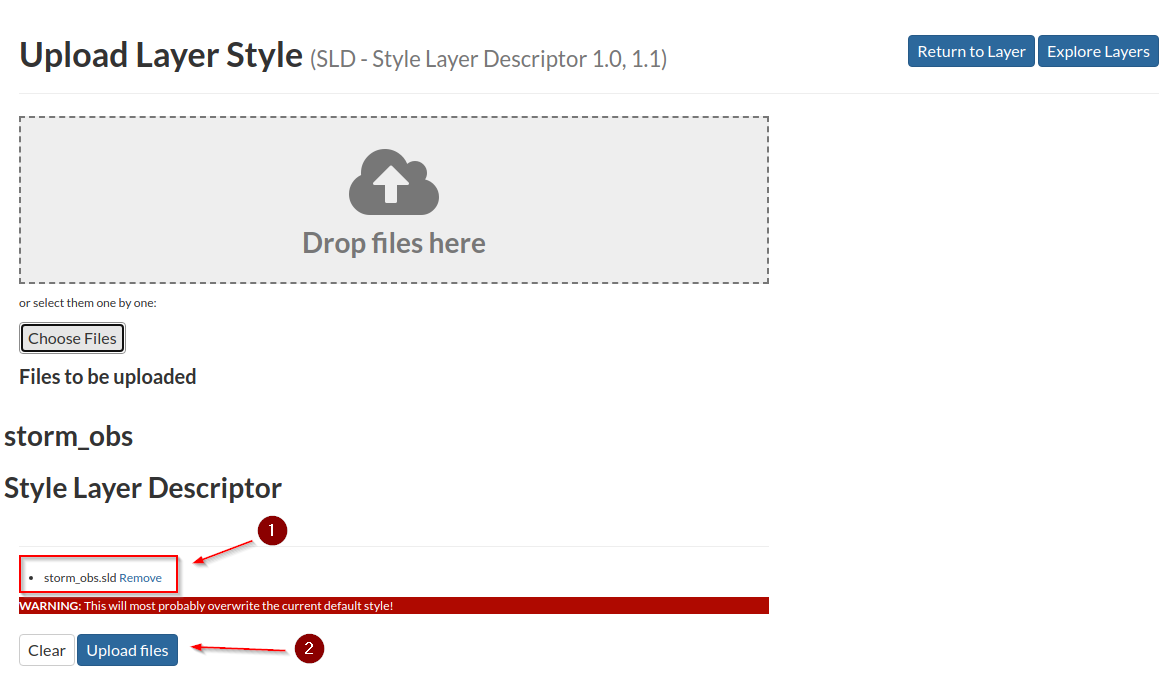
-
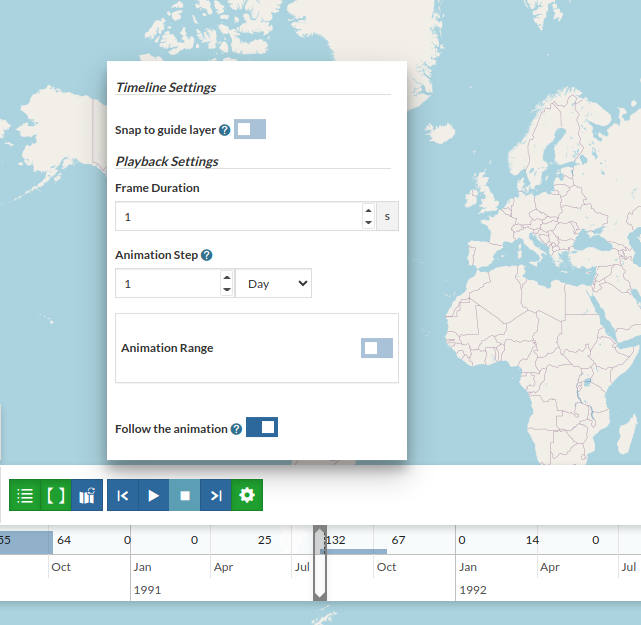
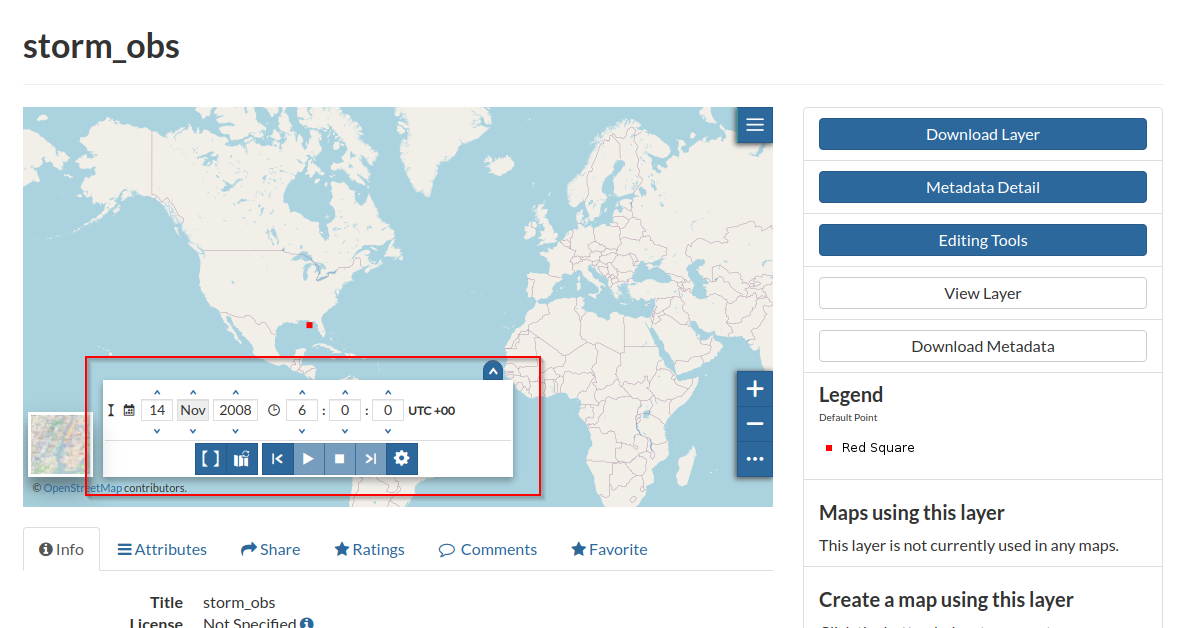
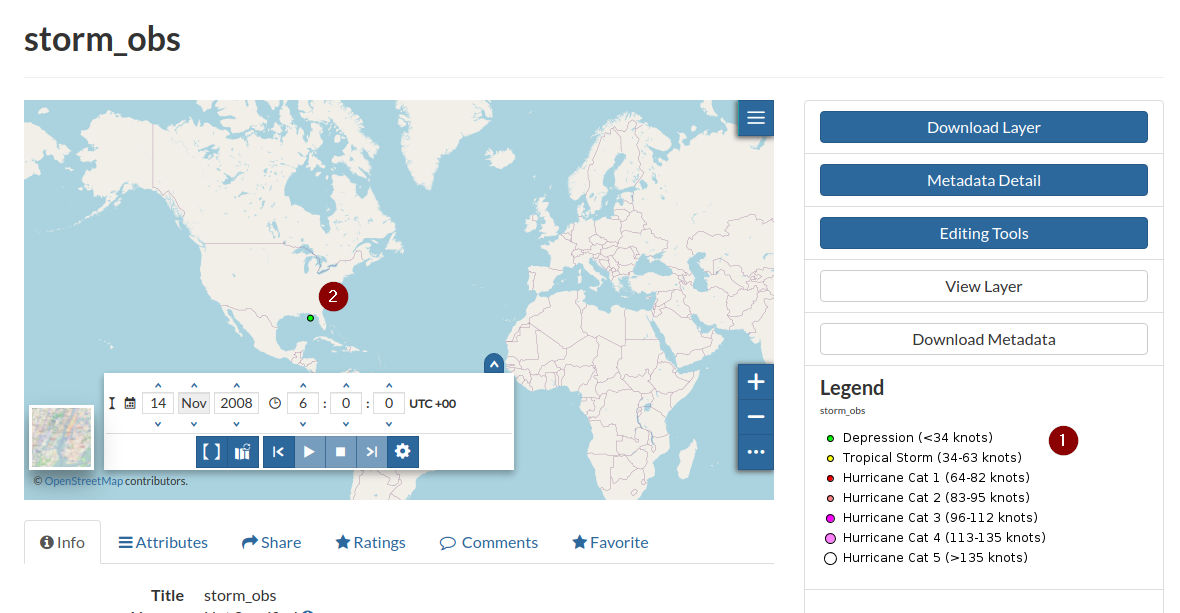
Go to the
Layer View, expand thetimesliderand try to move through the valid temporal instant and intervals